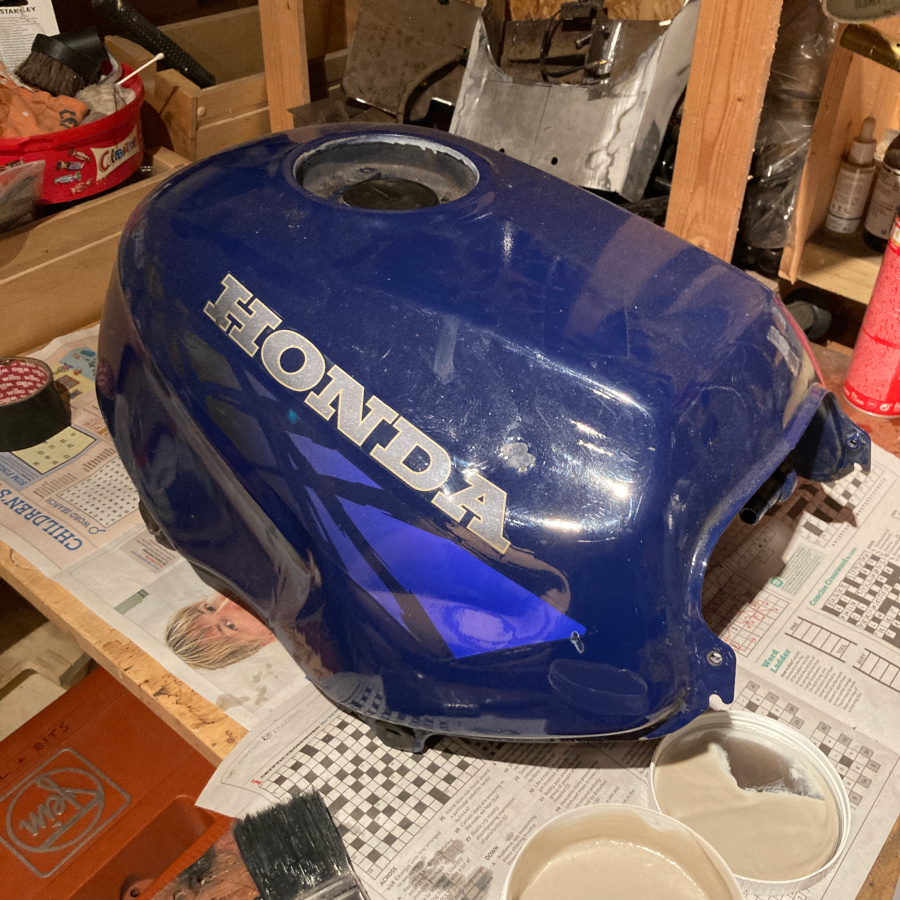
CB500 Tank prep
My tank has at least two dings in it - one I "may" have done on my last track day at Cadwell and one that I didn't spot till I got the bike home when I bought it.
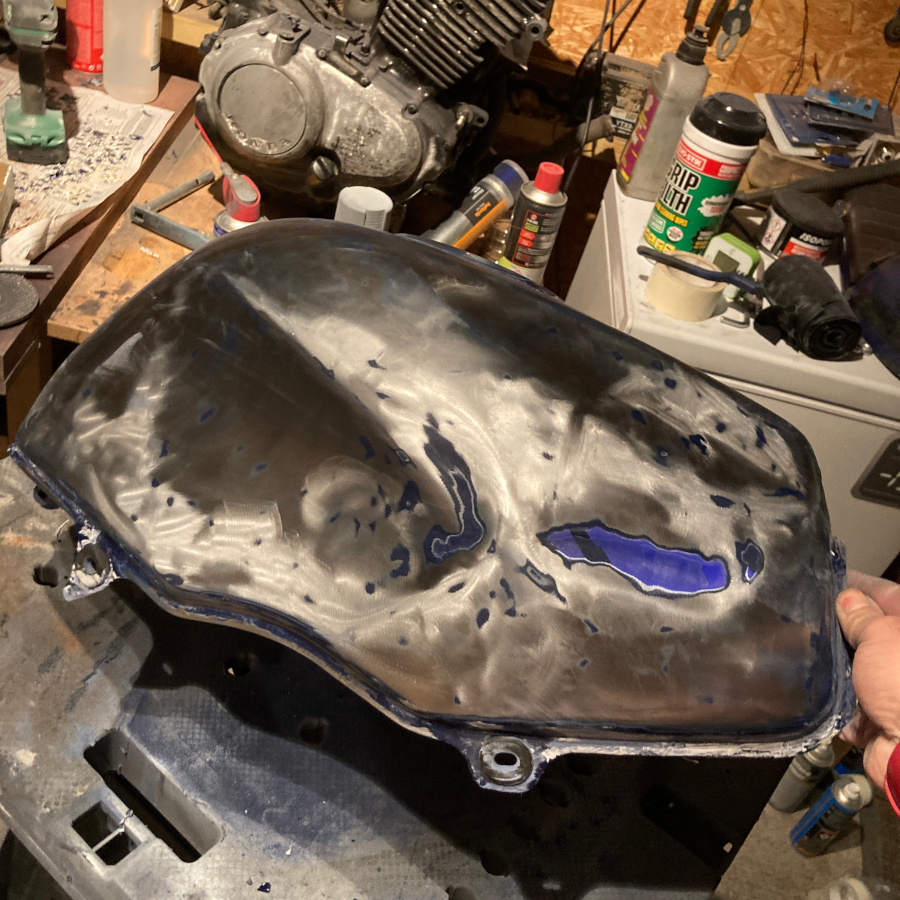
Unleash the flap disk (again)
I didn't have paint stripper strong enough to touch the cellulose job that had been done by the previous owner so I got busy with the angle grinder and got down to metal fairly quickly. What became apparent was that the tank was more like a walnut than I expected with little dents all over.
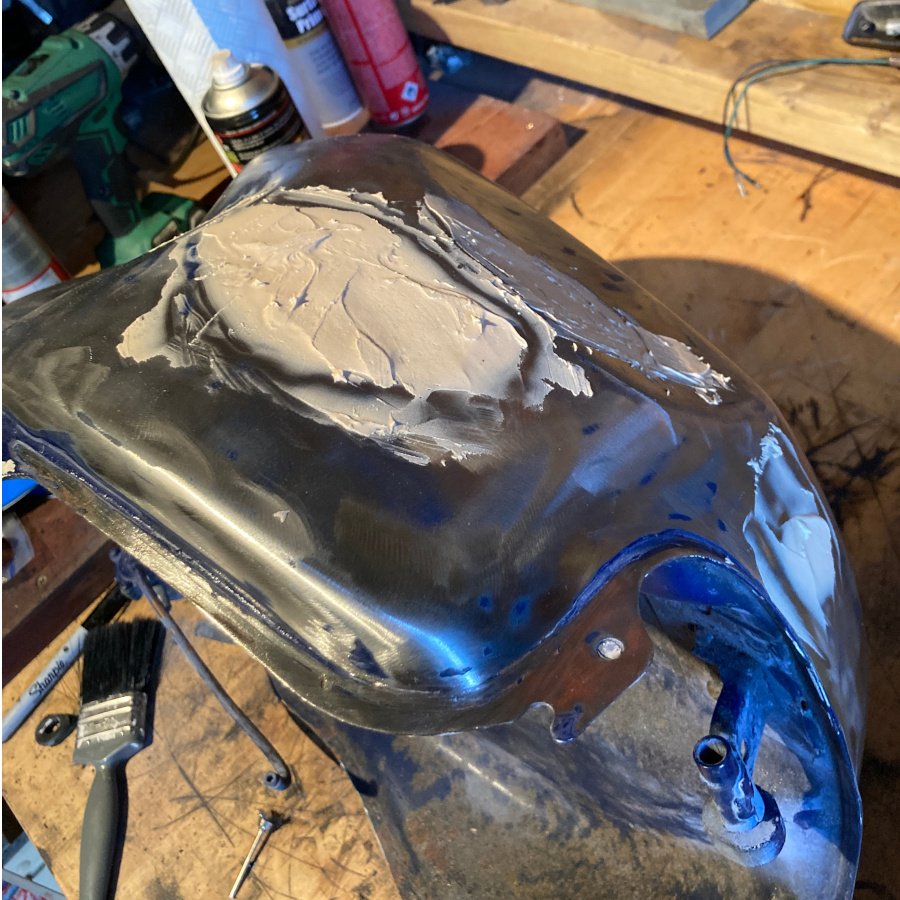
Fill for England
I decided to get stuck in with filler and try and get things sorted. Unlikely to get it perfect but hoping the main issues can be ironed out.
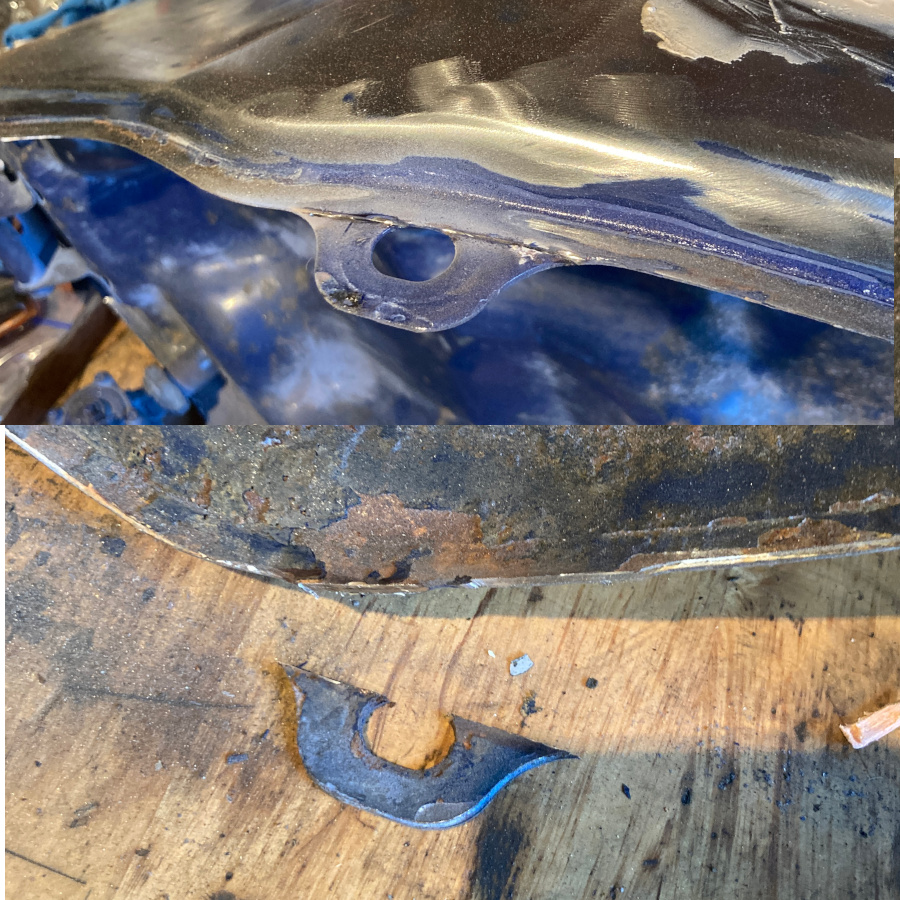
Get rid of those tabs
As I have my bike in a cafe style there is no need for the tabs that hold on some of the plastics from the original so it seemed a good time to Dremmel them off. It is some of these little things that will make the bike look more complete at the end.
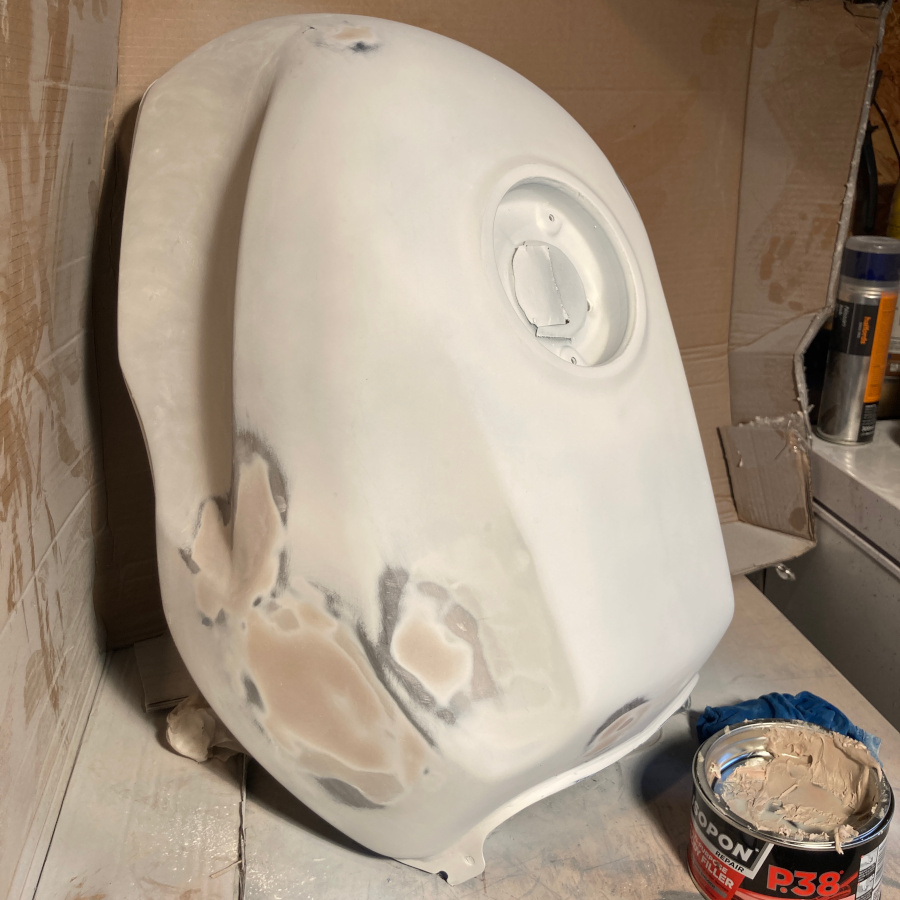
A lick of paint - and then more filling.
Once I had got things tidied I thought it good to get a little primer on and shine a nice bright light on it to see how much was still a problem. There were still issues so more filler went on and more sanding was done.
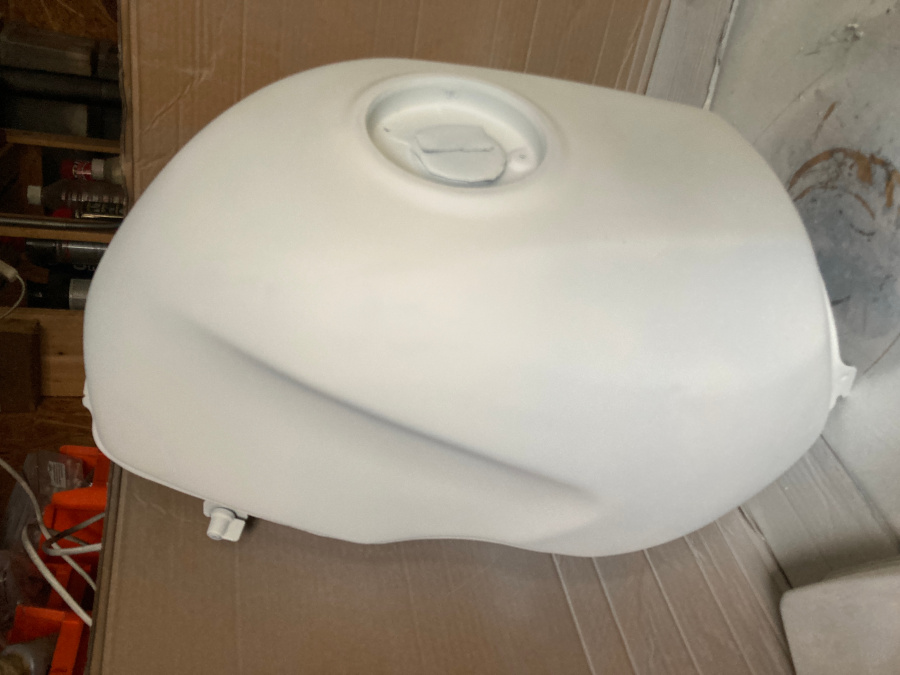
Not too shabby and ready for paint!
Finally the tank is ready for its base coat of paint. Pretty happy with the result and hopefully once it has a proper paint job and is back on the bike it should look crackin..
Next time... will I manage to replace my shims?